Showing posts with label sales. Show all posts

Thursday, March 5, 2009

Creating Your Own Business Cards

Let me start off with saying that this is going to be a pretty long post so I apoligize if it is boring to some. I just wanted to share some of my knowledge with you. Why pay for someone to make business cards for you if you have the talent and technology right at your fingertips? I am in no way an expert when it comes to Adobe Photoshop. I will be the first to admit it. I know that there is probably a more "professional" way of creating your own business cards, but I just wanted to share with you what works best for me!

You will need:


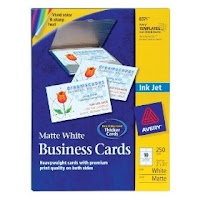
Blank sheets of business cards (I use Avery)
Adobe Photoshop
Microsoft Word
Printer


Open up Adobe Photoshop and go to File and select New. Under Document Size change the width to 3.5 inches and the height to 2 inches. Change the resolution to 300 pixels/inch. You can also name the window “Business Card” if you like, and then select OK.

For my business cards, I used a picture of one of my wreaths from my computer. If you would like to select an image from your computer to use, click Open and then select your image. This will open your image in a separate window in Photoshop.
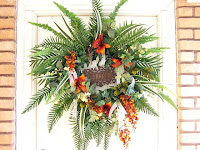


This is the picture that I used. I wanted to get rid of the door and brick in the background.

To remove any background from your image that you don’t want seen on your business card, select the Eraser Tool from the toolbar on the left. You can adjust the size of the Eraser brush using the toolbar located at the top of your computer screen.

When you have erased the background of your image, select Filter and then Extract. Using the highlighter tool, trace around the edges of the area to be retained.

Then click the Paint Bucket located at the upper left hand side of the screen. This will select the Paint Bucket. You need to click inside the image in order to fill it. Once you have the image highlighted and filled and you are satisfied, click OK in the upper right hand corner. The image should now be cut out with a gray checkered background behind it.

Use the Rectangular Marquee tool located in the toolbar to the left side of your screen to select the entire image. Then go to Edit and select Copy.

Select your window labeled “Business Card” and go to Edit and select Paste. I always change the percentage in the bottom left hand corner of the window to 300%, so I have a bigger view of the image. The image will appear blurry in this zoomed in view.

Once you paste the image, it will be much bigger than the window, so go to Edit and select Free Transform; this will let you make the image smaller. When adjusting the size of the image remember to hold down the shift key the entire time, otherwise the dimensions of the image will not be proportionate. You can also move the image to where you want it on the business card.

When you are happy with the size and location of your image hit the Enter key.

Now you can change the background color or add text to your business card.

To add text, go to Layer, then New and select Layer.

Select the Horizontal Type Tool and then click on the “Business Card” window where you want your text to be and type in your text. You can move around your text at anytime by selecting the Move Tool located in the toolbar to the left of the screen. You can change the font, size and style of the text with the toolbar located at the top of the screen. Just highlight the text by dragging the mouse over it and then you can make any changes.

Change the percentage of the window back to 100% so you can see the actual size of the business card to make sure the text is legible. When you are happy with the look of your business card go to file and save.

Open Microsoft Word and go to Mailings and then select Labels. Click on the Options tab, and then select the corresponding template for the labels you have purchased. The labels I use require the 8371 template. Once selected click OK and then click New Document.

You will see a page with the outlines of the business cards. Be sure to save your document.

Mouse over the first box on the page and hit the backspace button this will remove any spaces from the box.
Go to Insert and then Picture and find the Photoshop document that you saved on your computer and click Insert. Repeat until all of the boxes contain your business card image.

Insert your sheet of labels in the printer and click print. Be sure to print only one sheet at a time since the labels sheets are thicker than regular paper.

Follow the instructions printed on the labels to separate the business cards.

Tuesday, March 3, 2009

Another Custom Design

One of my co-workers saw the "Watermelon Delight" wreath that I had made and she fell in love with it. She wanted a pink and yellow spring wreath to display on her front door. So I told her that I could make the same kind of style as the other wreath and just substitute the green flowers for yellow ones.


I brought the wreath up to work yesterday, and she was blown away! She has probably ordered about five wreaths from me before, but she always gets so excited about each one. It always makes me feel so ecstatic!

Saturday, February 21, 2009

Watermelon Delight

I hope everyone is having a wonderful weekend. I just thought I would post one of my latest creations for your viewing pleasure!


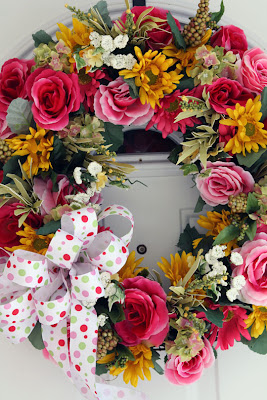
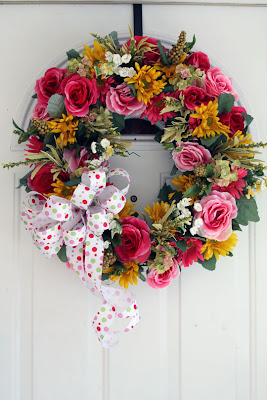
One of my local customers contacted me and requested a custom design. She said she wanted a pink and green wreath and that she wanted it to look very "feminine". I told her that I had been wanting to make a pink and green wreath ever since I started on the spring designs for this year. Anyways, this is what I came up with.

She said that the door she wanted to hang it on was small so instead of my typical oval wreath, she wanted a smaller round one. I love this ribbon that I found. The pink, red and green polka dots match the flowers perfectly!

I always try to come up with clever names for each wreath that I make and this particular one reminded me of a watermelon with the various pinks and lime greens - hence the name Watermelon Delight. I know I say this about all of the wreaths, but this one might just be my favorite!

Friday, February 20, 2009

I'm International

I'm officially international! I made my first international sale last week (I sold a wreath to a customer in Ireland!) and I am super excited about it. If someone would have told me last year that I would be shipping my wreaths to a different country, I would have thought they were crazy.
I was sort of intimidated by the whole idea of selling and shipping internationally; unsure of what the cost would be and what customs forms needed to be filled out. Tuesday morning I took the package to the Post Office and was able to find the correct forms to fill out. I parked myself in the corner and began filling in all the specific details in the customs form. I finished the forms and made my way to the long line. It always seems like no matter what part of the day it is, there is always a long line at the Post Office. When I finally got to the desk, the clerk took the package, stamped it a couple of times, weighed it, asked if I wanted insurance (uh, yeah!) and that was it! I don't know what I was expecting, but I never thought it would be that easy!
It is just a shame that my wreaths have to be packaged in big boxes which drives the price of shipping up, especially shipping outside of the US. It ended up costing $50 to send it. But if customers are willing to pay for shipping costs, I am happy to ship wherever!

Saturday, January 31, 2009

Garden Party

One of my co-workers had seen a wreath that I displayed up at work a couple of weeks ago and she told me that she would love for me to make her another wreath. She bought a lovely magnolia wreath from me last year and she was saying that she wanted a "springtime" wreath. She was going to be having a party at her house in February and she needed a colorful wreath to put on her door. Usually when someone asks for a special order I always tell them to give me specifics (i.e. shape, color, any ribbon, any sign or ornaments, etc), but all she wanted was lots of color! I want the customer to be completely happy with their wreath and I want it to look like they had it pictured in their head, but it's always fun to have complete creative freedom as well!

So I headed off to the craft store after work and I was very excited to see that they had their new shipment of spring flowers on display - I was in heaven to say the least! I made my way through the floral section picking up stem by stem and imagining in my head what this was going to look like. Then off to the ribbon isle to pick the perfect match for the purple/yellow explosion of flowers to be! I found this gorgeous purple to pink faded ribbon and held it up to the flowers. It was perfect. The weird thing is they have the same ribbon all the time, the selection never really changes, but I discover new rolls each time. I had never seen this ribbon before, but it has always been there. I have just never needed it, so I don't even see it; I go into the store with selective blinders on!

Anyways, I paid for everything and finally got home. I couldn't wait to start putting this one together. With some wreaths, it takes me a while and no matter what I do or how I arrange them, I can't seem to get them just right. That was not the case with this wreath - it all went together like clock-work! I had a hard time parting with this one. I pictured what it would look like on the front door of our new house (that we haven't even started to build yet), but then I thought to myself I can always make another one just for me!

I took the wreath up to work the next day and everyone loved it. My co-worker was very excited and she took a whole stack of business cards from me to hand out to her guests at the party! Hopefully I will get some new customers soon!

Monday, January 12, 2009

Nature's Palette

I would like to introduce the newest creation to add to my floral collection -- Nature's Palette. I found this vase at Hobby Lobby and thought it was so beautiful! I got home with no flowers at all; partly because the floral stems were not on sale last week and partly because I had spent a chunk of change on the four other vases that I had bought - but that is a different story! So I get home and look through my floral inventory which is limited. I was not expecting to find anything that would match at all, and too my amazement I had every single stem in the picture, even the bright yellow magnolia stems! I was so excited and just had to start making the arrangement right away. And voila! Here is what I came up with.

To see more pictures of this arrangement and others check out http://www.southerngirlflorals.etsy.com/.


To add to my enjoyment today, I made my first sale on Etsy! I know I have already made sales on eBay, but this is different. This is a place where no one really knows about me yet and I do not have that rapport with my customers like I do on eBay. I hope that this is a sign of things to come!